LOUISE’S STAIRWELL · RAYNES PARK / WIMBLEDON · 25 OCTOBER 2026
One wet patch.
Several ways in.
Water appears on the exposed party wall only in heavy, windy rain. Follow the possible routes from the roof to the stairwell—and see what would distinguish them.
Explore the scenarios ↓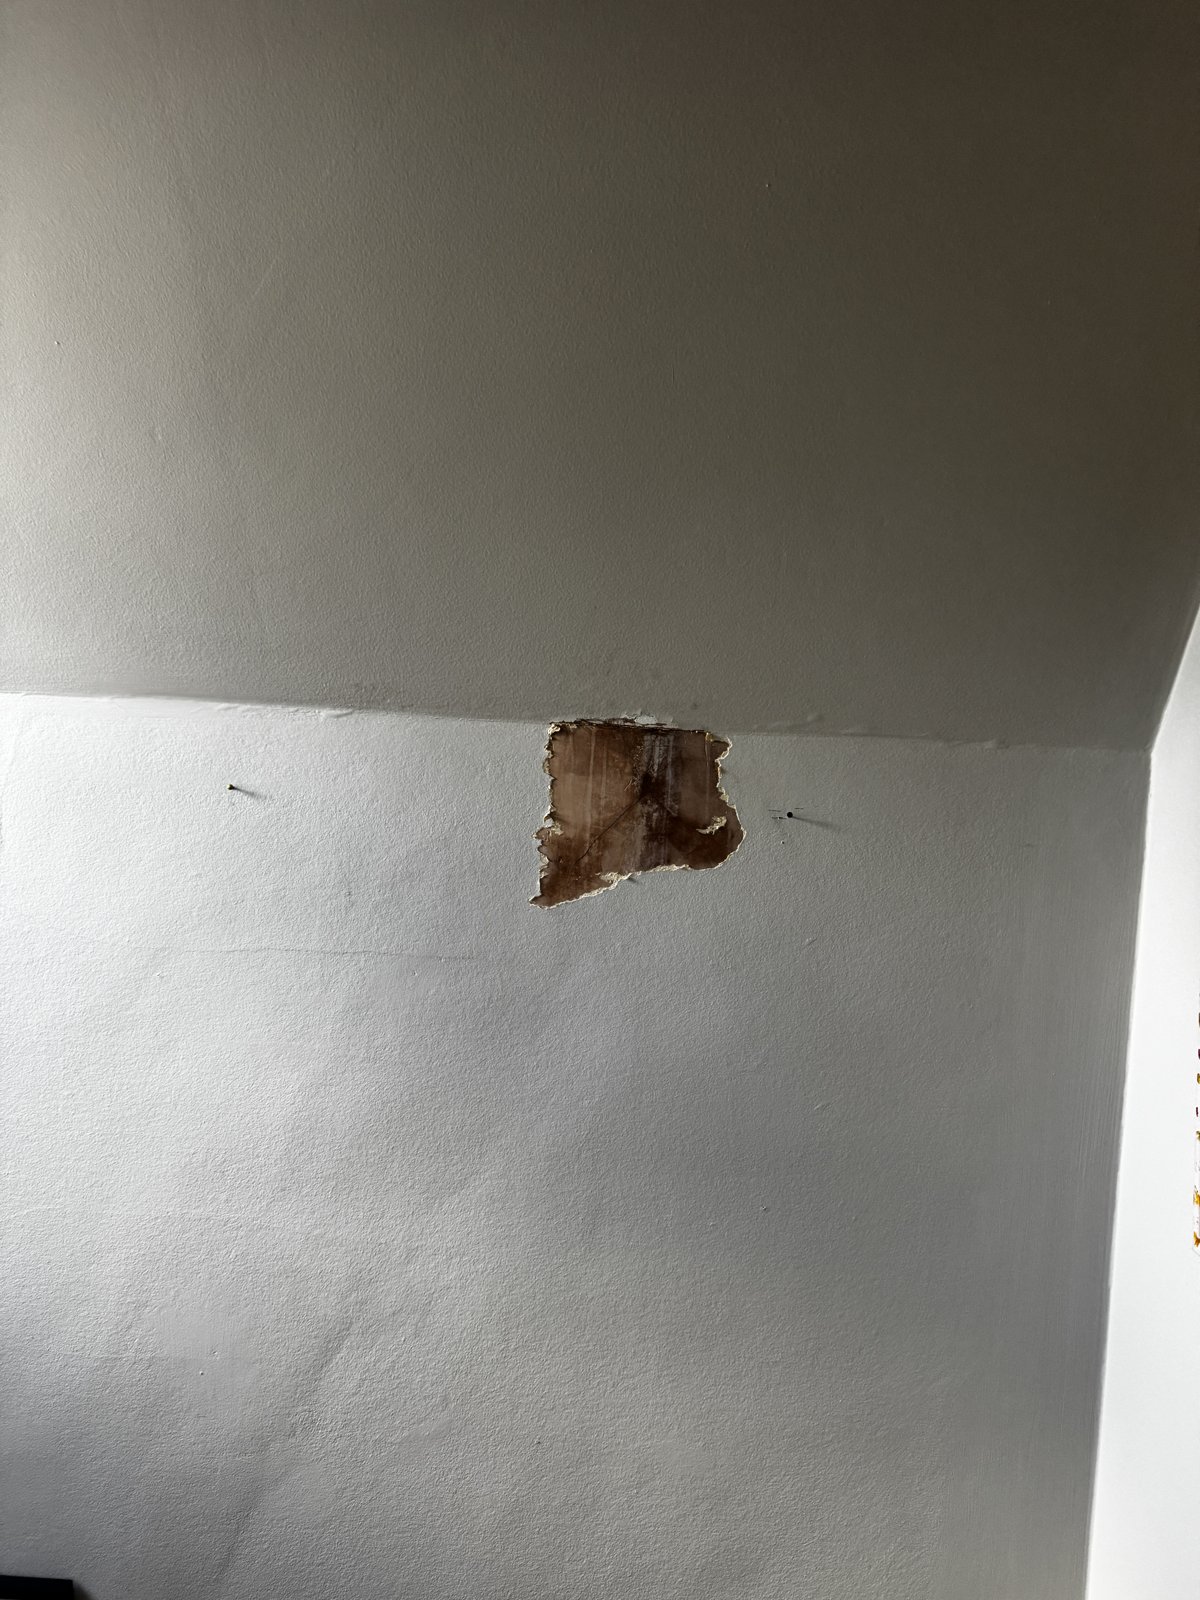 01 Reported water exit
Start with the shared parapet and its roof junctions. The patch is on the party wall. Rain may enter through its coping, either side’s flashing, or a nearby roof detail before travelling inside. The evidence does not establish that the neighbour is responsible.
Diagnostic confidenceLow · inspection needed
01 / FOLLOW THE WATER
Choose a possible route.
Illustrative animations, not a fluid model.
Water paths and timing are hypothetical.
Photo proportions are anchored to the small rooflight. Size and external pitch are not measured; changing them explores scale uncertainty, not leak probability.
Photo-proportioned reconstruction. Small rooflight identity confirmed; its exact external size and roof pitch remain unverified. Blue = a hypothetical route; amber = a possible entry. Google Maps supports the rear roof massing; dimensions and waterproofing details remain provisional.
Water can travel behind a finish or through joints, then emerge at a local crack, seam or opening. The exposed patch may be the easiest visible exit. It does not prove that the rest of the wall is dry, or that the water entered directly behind it. The photos show an exposed brown substrate; its material and the wall’s internal construction are unconfirmed.
02 / WHAT WE ACTUALLY HAVE
Evidence, with its limits.
15 photographs + one textured LiDAR mesh + Google Maps captures.
Select a photograph to inspect it.
View all 15 photographs
Confirmed by the family
The exposed patch is on the party wall. Seepage occurs only with heavy rain and wind. Louise lives at number 19 and the neighbour at number 17. The family reports an accessible flat roof at number 19; Google Maps captures support the contrasting rear roof forms. The small rooflight beside the parapet is the stairwell window seen in the scan.
Still to establish
Exact exterior registration of the patch; hidden roof build-up, flat-roof drainage, wind direction and delay between rain and seepage. Left/right ownership is not used to assign blame.
What the scan tells us
The original GLB records interior surfaces and layout. Approximate patch and rooflight reference points have now been picked in the textured mesh and are shown in the scan view. Its mesh spans roughly 2.74 × 3.89 × 2.13 model units (nominal metres, unverified). LiDAR cannot see moisture, concealed flashing or the route through the wall.
02A / PHOTO + SCAN CROSS-CHECK
A closer fit to the house.
The small rooflight is our confirmed anchor.
Dimensions below are estimates, not a survey.
Along the party wall between approximate patch and rooflight reference centres in the GLB, towards the uphill side of the window. Nominal metres if the scan scale is correct; allow roughly ±0.2 units for feature picking, plus unmeasured scan-scale error.
Approximate vertical difference; plausible picking range 0.2–0.5 scan units. This refers to the chosen centre points, not the sill or roof entry.
Both close views put the small window beside the parapet near the stack. The model now reflects that. A four-corner rectification was tested, but its long-distance extrapolation was too unstable to claim a measured ridge-to-eaves length.
The narrow strip beside the window is a useful inspection target. Flashing and perspective obscure the exact roof-plane gap.
How the LiDAR was used
Texture-guided reference picks: patch ≈ (0.75, 0.32, −0.80); rooflight ≈ (−0.80, 0.65, −0.43), in original model coordinates. Units are treated as nominal metres, without independent scale validation. These are approximate feature centres, not surveyed corners. Glass and open edges are unreliable scan surfaces.
How the zoom was handled
Original iPhone EXIF reports 181–249 mm equivalent for the close exterior views; interior views report 24 mm. A four-corner rectification was tested: perturbing corner picks by about 5 pixels changes the estimated whole-slope ratio substantially (roughly 5.5–11.3 window-reference lengths in a sensitivity test). We retain local proportions and qualitative positioning, not that long-distance measurement. Zoom does not supply subject distance or restore hidden details. The raised frame is only approximately coplanar with the slates.
What is still assumed
The external window envelope and overall roof dimensions remain assumptions. Fits to selected wooden rooflight-frame points suggest roughly 30–40°, with 35° used as an illustrative starting value. This is a provisional frame-based orientation, not a surveyed external pitch. The selected photo reference is not a verified manufacturer outer frame. Read the VELUX type plate to resolve size. Google Maps supports the rear roof massing, but not precise terrace dimensions, waterproofing details or current condition.
02B / READING THE ROOF DETAILS
What the covering can tell us.
Slates with overlapping courses
The roof shows small flat units with staggered joints and thin, irregular edges, consistent with a double-lap slate covering. Natural versus manufactured slate, concealed headlap, underlay and fixing condition cannot be established from these views. Visible clips/hooks may be installation or repair fixings; they are not proof of a leak.
Stepped lead and hidden soakers
Stepped metallic flashings and successive laps are visible against the brick parapet. In a conventional slate abutment, individual soakers sit between courses and turn up the wall; a cover flashing protects their upstands. The visible lead does not prove the hidden soakers exist or are intact. The new detail view explains that distinction.
A weathered shared parapet
Segmented coping stones, joints, local vegetation and weathered pointing are visible. The upper chimney brick faces also show surface loss. Inspect joint continuity and water-shedding edges, but do not infer a failed damp-proof layer from a photograph. The wall core, coping bedding and chimney top are concealed.
Coping / masonry / chimney junctions and either side’s flashing are equal first inspection priorities (40% each). The flat-roof transition receives 20%, with massing supported by Google Maps but details unverified. These are subjective weights among three selected groups, not probabilities calculated from LiDAR or photographs. The patch appears uphill in plan from the small rooflight, so a simple downslope window-to-patch route is not retained as a leading animation. Rooflight flashings and adjacent slates remain secondary checks; a different concealed route is not excluded. The lower eaves gutter has no demonstrated route to this high patch. Local house type does not establish hidden construction.
02C / GOOGLE MAPS CONTEXT
19 is Louise’s. 17 is the neighbour’s.
House identities confirmed by the family.
Image acquisition date unknown.
Different rear roof forms
The supplied views show a broad flat rear roof at 19 and a pitched rear roof at 17. The shared boundary therefore changes character behind the front slope.
The same window reference
The small front rooflight at 19 sits beside the 17/19 party wall. The larger rooflight is farther across Louise’s roof. This helps identify the correct side in the exterior model.
Context, not a roof survey
Google’s 3D reconstruction visibly distorts edges and surfaces. These captures support overall orientation, not exact distances, present condition or a proven connection to the wet patch.
Rear view · compare the roof forms
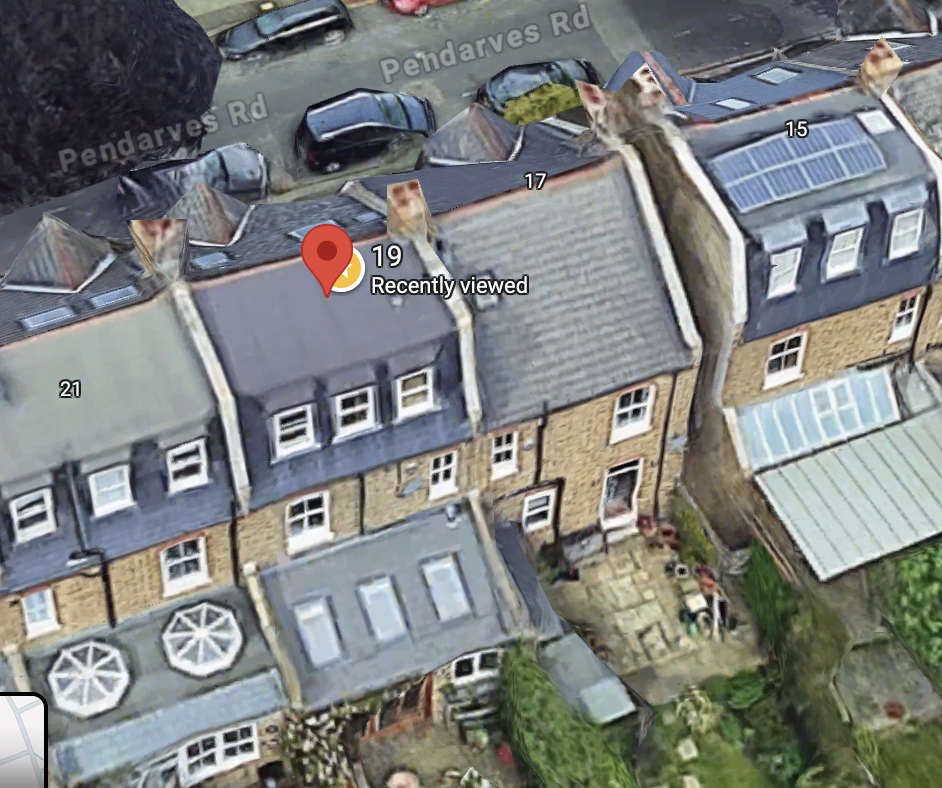
Front and oblique views · identify the rooflights
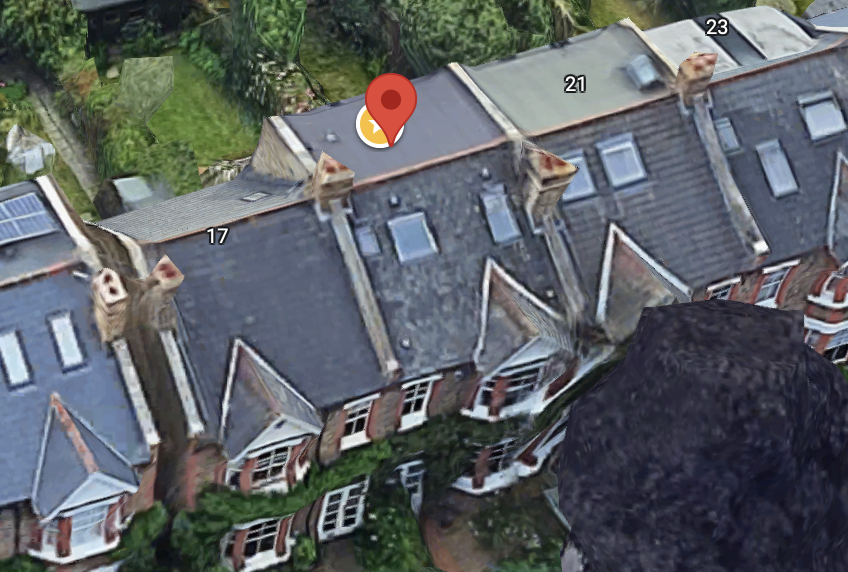
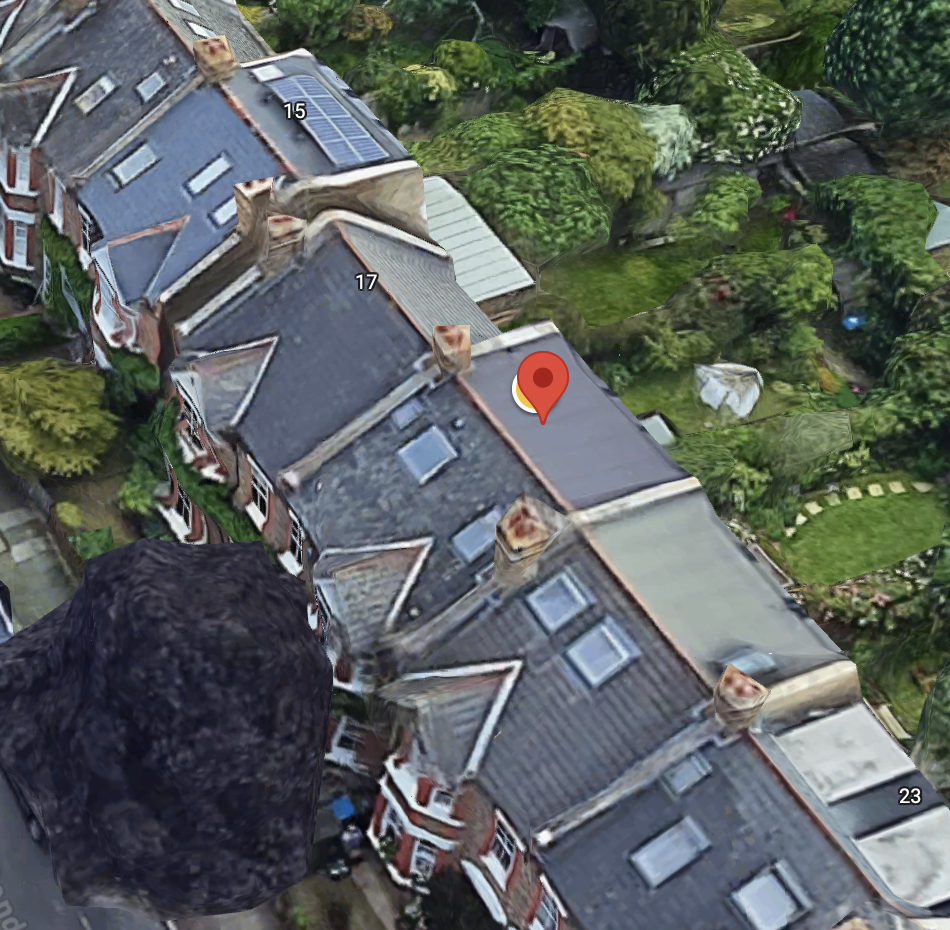
Source: three Google Maps screenshots supplied by the family on 25 October 2026. Captures reproduced as supplied; no dimensions derived from this photogrammetric mesh.
03 / TURN HYPOTHESES INTO EVIDENCE
Inspect the route.
Then choose the repair.
A targeted visit by a roofer or building surveyor should cover both faces of the shared wall, rather than beginning with an assumption about ownership.
- Map the patch to the roofUse the stairwell rooflight as a common reference. Measure the patch’s horizontal offset and height; locate the corresponding parapet section and terrace junction. The small window beside the parapet is confirmed as the stairwell window. Obtain its size code to establish an external metric scale.
- Record the next natural stormFrom a safe indoor position, note rain onset, wind direction, first dampness and when seepage stops. Photograph the same patch and inspect the rooflight surround for fresh wetness. A time lag is useful, but not diagnostic by itself.
- Inspect the vulnerable details close upCheck coping joints and ends, pointing, both flashing chases and laps, chimney back gutters, rooflight channels, slates, terrace upstands and outlets. Street-level photos cannot verify watertightness.
- Test one area at a time, if neededA competent roofer can plan controlled, low-volume isolation tests with someone observing indoors and time allowed between zones. Do not flood the roof or pressure-wash joints: this can create an artificial leak.